

A User Guide on How to Trade on Binance (Futures)


WELCOME! To begin, there are a few hurdles we must jump. If you are new to the crypto space, then this tutorial is for you.
HOW TO BEGIN
It is important to have the BINANCE app installed on your mobile device in order to successfully continue this process. Below are the steps on how to install and startup your BINANCE account
• Open the Google Playstore/Apple store app on your mobile device.
• Type "BINANCE" in the search bar.
• Click on "Install".
• After installing, open and sign up.
• Perform the necessary tasks; Registration, KYC, e.t.c. NB Binance KYC takes about 3-5 working days.
• Your Binance app is ready to use.
FUNDING YOUR BINANCE ACCOUNT
If you wish to fund or withdraw from your binance account within a short time, kindly engage Bekonta customer service on +2348167990764.
FUTURES Is a trading space on the binance app where trades are done. Note that it is quite risky to trade on futures, which is why the best signals would be provided, with adequate settings, so as to mitigate losses.
HOW TO TRADE ON FUTURES
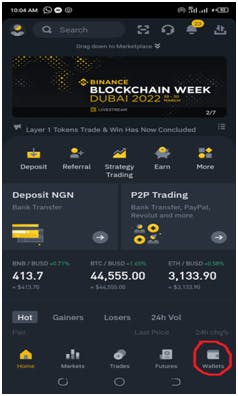
• Open your binance app on your mobile device.
• Click on the 'Wallets' tab at the bottom right hand corner of your screen.
• Click on 'Spot' tab at the top left hand corner of your screen.
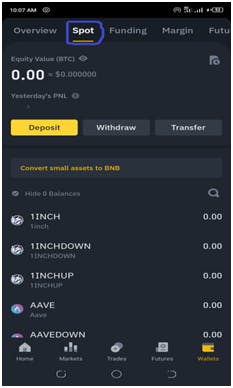
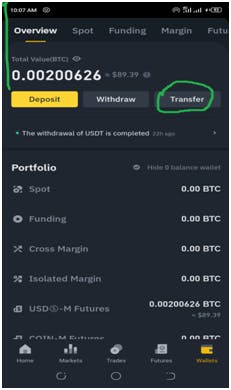
• Click on transfer.
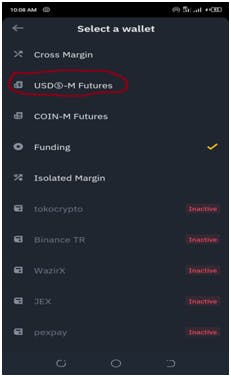
• Click on 'funding' and change the entry to 'USD(s) - M Futures'.
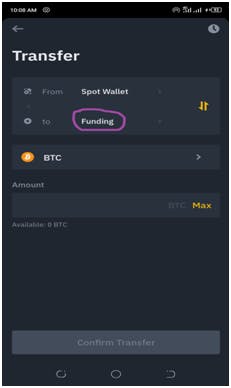
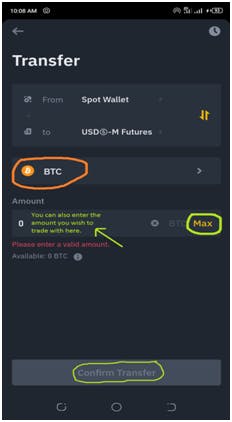
• Now click on the default coin and change it to USDT by typing USDT in the search bar and clicking on it.
• Max out the amount in the space bar in order to empty your spot and move it to futures. NB if you decide not to move all the money in your spot, simply enter the amount that you wish to move.
• Then click 'Confirm Transfer'.
AFTER I AM PROVIDED WITH A SIGNAL, WHAT SHOULD I DO???
• Now that your USDT (Digital dollar) is in your ‘Futures’ wallet, proceed to click on the ‘Futures’ tab at the bottom right hand corner of your Binance app.
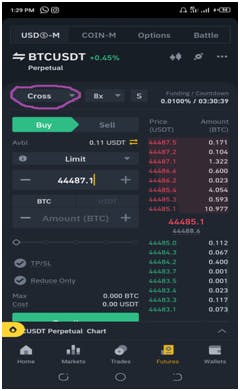
• You would be required to change the margin mode from “Cross” to “Isolated” by clicking on “Cross” and following the directions as shown below.

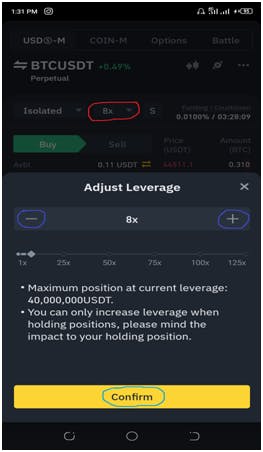
• Next, click on the tab next to the margin mode (Isolated or Cross) tab and set your leverage to 5x, you can use the plus(+) and minus(-) signs to adjust your leverage.
NB : Leverages higher than 10x are more likely to cause complete liquidation of your capital, you may make use of leverages greater than 5x if you are told to do so by your mentor or signal provider.
• Next, make sure what you see on your screen is “limit” and not “market”, you can do this by simply tapping the drop down arrow and changing it to limit if it isn’t on limit, also type your entry price figure in the box directly below “limit” tab underneath.
• Next, adjust the percentage at which you are buying at by dragging the the thin line in the direction of the red arrow beneath it till it gets to the end, and then click on”Buy/Long”.
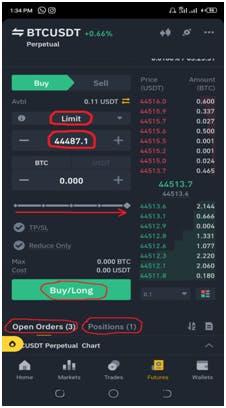
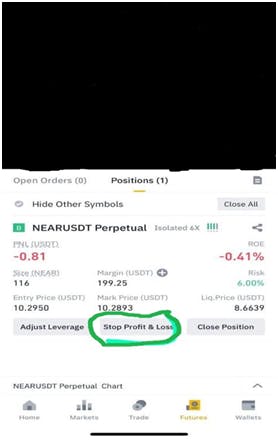
• As soon as the coin has been bought, it moves to “Open Orders” as shown above, and when it cliques with the entry price at which the trade was entered, it goes to “Positions” after which you would be required to click on “Stop Profit & Loss”.
When that is done, you would be directed to another page where you would need to set your take profit price and a lower amount which would serve as your stop loss price. These would be provided to you via signal information.
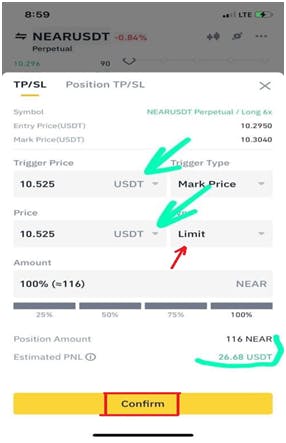
• Click on Limit and then input the take profit figure provided to you in the boxes labeled “Trigger price” and “Price” respectively. DO NOT CHANGE MARK PRICE TO ANYTHING. After that click on “Confirm” and wait to cash out!!